Detect motherboard drivers
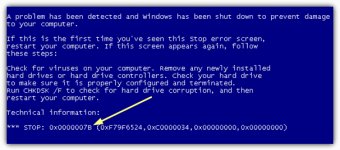 One feature that was useful in Windows versions prior to XP was you could simply take out a hard drive that has Windows installed and connect it up to another computer. When it boots it up, it’ll start to detect and install all device drivers again. When you change the motherboard or move your hard drive that has Windows XP installed to another computer, be prepared to get endless looping reboots or the famous blue screen of death (BSOD). The error will usually be a STOP 7B error which is related to a problem with the hard drive controller.
This problem is often simply due to the fact that the storage controller used by Windows XP requires a different driver depending on what type of hard drive controller is on the motherboard. If the old controller uses one driver and the new controller requires a different driver, XP is trying to boot with the old driver and throws up the blue screen because the wrong driver is trying to load. The recovery console or even Safe Mode isn’t usable because Windows can’t boot anything without the correct software for the controller. The only real hope you have of this problem not occurring is to use a motherboard with exactly the same chipset for the hard drive controller.
After all these years since the release of Windows XP, it’s still not a straightforward task to move a Windows XP hard drive and partition to another computer without getting a blue screen. There are some easier ways to do it although they cost a fair amount of money. Amazingly, a large proportion of websites on the internet (including Microsoft) will tell you the only solution is to perform a Repair Install or even completely wipe your XP install with a format and re-install. Thankfully there are ways around the issue. You can firstly avoid this problem before moving XP to the new computer or motherboard if you know what to do, and secondly the problem is still fixable even after you have moved XP to the new hardware configuration. Here’s how to do it.
 This is obviously the much more preferable method because it will stop you getting the problems after moving to the new hardware and requires the usage of no extra software.
1. Go to Control Panel and open System.
2. Click the Hardware tab and then click the Device Manager button.
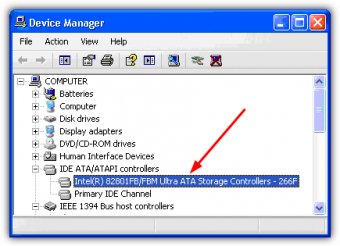
3. In Device Manager expand “IDE ATA/ATAPI controllers” by clicking the + sign.
4. Right click on the FIRST controller in the list and select Update Driver, it should be the one with a manufacturer name, such as VIA or Intel etc.
5. Select “No, not this time” when asked “Can Windows connect to Windows Update to search for software?” and click Next.
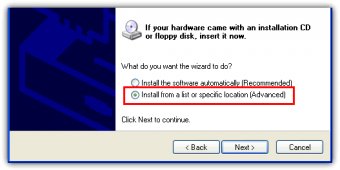
6. Select “Install from a list or specific location (Advanced)” and click Next.
7. Select “Don’t search. I will choose the driver to install” and click Next.
8. Select “Standard Dual Channel PCI IDE Controller” and click Next.
9. Click No when ask to restart. Now shutdown the computer, remove the hard drive and install it on another computer, or replace the old motherboard. As you’ve probably worked out, this solution simply reverts the driver back to the standard Microsoft controller driver you would have on a clean install. Do note this method won’t help if you’re trying to use the XP drive on an AHCI enabled target system. You need to make sure the BIOS is set to IDE or standard SATA mode.

